Wednesday, December 30, 2020

New Equipment - Part 2

With a clear sky and full moon I decided to spend the majority of the early evening on Dec 29th to get the remaining software device drivers installed on the new NUC.  Needed to have the equipment connected to do that, so I had to set up the telescope. For some reason I decided I would replace the EdgeHD11 with the GT102 APO that night as well since I eventually want to image some winter nebulae. 

One lesson I should have learned by now is that you shouldn't try to do everything at the same time. I had completely forgotten that in order to mount the GT102 I needed to reset the mount point of the dovetail plate on the mount. By the time I got the mount reset, plate screwed down, and telescope balanced, I had spent about 2 hours of time. I did eventually load the software drivers and configured everything to run on the new NUC. It was time to run a short imaging run to test things out. But by the time I was set, the clouds moved in. Oh well, at least I'll be ready for the next clear night, hopefully soon. 

Friday, December 25, 2020

New Equipment (aka, a Christmas Gift)

Merry Christmas to all. I trust you all had a wonderful Christmas. 

With the Great Conjunction now over (I'm still a little bummed that I didn't get any photos) its time to start working on the next full year of astroimaging. Both 2019 and 2020 have taught me that NUCs (Next Unit of Computing) mini PCs work really well as pier-side computers for running your telescope equipment. But it also taught me that, like in all other areas of technology, astro gear improves over time. My Minisforum GN34 NUC has served me well over the past months, but there were plenty of nights when the unit's speed and capacity were strained with what I was trying to push through it. So I asked my better half for a new one for Christmas, and she knew just which one to get!

So today, after the rest of the activities were done, I started to load up my software on my new BeeLink U57. This unit boasts a 5th Generation Intel Core i5 processor, 8GB of memory, a 256GB SSD and of course plenty of USB3 ports, WiFi, BlueTooth and Ethernet 1000 Mbps LAN, all in a box 124mm x 113mm x 41mm. Comes with Windows 10 Pro, so remote logins are easy.

Software is all loaded and tested. The speed is a large improvement over the GN34. Now I just need some clear skies to put it through the paces. The only annoying part of the adventure so far has been the discovery of the power connector on the NUC. I have custom cabling that runs all my 12v power to my telescope equipment thru Anderson Powerpole connectors and 2.1mm plugs. Of course, Beelink decided that their unit would use a 2.5mm plug. So for this weekend I'll need to run the unit via the supplied 120v to 12v adapter until my new cables come from Powerwerx.

Thursday, December 24, 2020

Great Conjunction

No images for me - the weather just would not cooperate, at least for imaging.  Tried again on the 22nd but no luck.  Some friends dropped by and we all got to view the conjunction for a few minutes while there was a short break in the clouds.  My GT102 with 13mm and 8mm eyepieces provided a wonderful view.


Tuesday, December 22, 2020

Great Conjunction of Jupiter and Saturn

You know, rare astronomical events events occur whether we can see them or not!  Yeah, profound statement (well, maybe not too profound).  But, regardless, such is the life of an amateur astronomer.

Had the telescope and camera gear out on the 20th (since the weather forecast for the day of the event was for overcast skies).  Set up just outside Westminster MD, on the parking lot of my church.  It was very cloudy, but the Lord provided a sliver of clear sky so that I (and the guests I had with me) were able to see the 'near conjunction' visually.  Getting the camera set-up was problematic, and by the time I had the system up and running (software glitches), clouds covered the scene. 

The view was awesome!  Both Jupiter and Saturn were clearly visible, displaying their respective details - Jupiter's cloud belts and Saturn's magnificent ring system. The GT102 (with only 703mm focal length) only provided a small planet size, but no matter, both planets (and a collection of Jovian and Saturnian moons) were present in the same eyepiece field of view. It was worth it!

With Tuesday night promising some clear skies I will try again to image this wonderful event. Yes, they won't be as close as on the 21st, but still should make for a great shot if I can get both planets and the moons to show up in the same image.

Sunday, December 13, 2020

The Great Conjunction of Jupiter and Saturn

Jupiter and Saturn Conjunction - Dec 21, 2020

Just after sunset on Monday, December 21, 2020, our two largest planets will come closer to each other than they have in almost 400 years. A conjunction happens when planets appear very close to one another in the sky because they line up with Earth in their respective orbits. Over the past few weeks, Jupiter has been closing in on Saturn's position. And on December 21st they will be the closest since 1623. 

Will they appear as a single "Christmas Star"? Not likely. If you have good eyesight you should be able to make out two distinct points of light, with Jupiter outshining Saturn by 10 times in relative brightness. Look southwest, about a half-hour after sunset (5:15 pm). The planet duo should be visible in the darkening sky. You will need a clear view as the pair will only be 15 degrees above the horizon. Binoculars and small telescopes will reveal a splendid sight, and with sufficient magnification you'll be able to see both planets — Saturn with its famous ring system and Jupiter with its cloud bands and Galilean satellites — simultaneously in the same field of view!

Typical field of view in a moderate telescope at 350x


I will be attempting to photograph this event from my location in Maryland. Using a William Optics GT102 refractor and ASI462 camera I should be able to capture both planets in the same frame.


Monday, October 26, 2020

Mars 2020 - The Magic of "Lucky Imaging"

The best opposition of Mars until 2035 has just passed with the best times to view and image the red planet between late September and mid October. The weather cooperated (mostly) and we were all treated to a wonderful display (without the giant dust storms of 2018).

I was out every chance I got to image the planet when it was the closest and brightest. Mars was well placed, high in the sky. As reported back in early September I imaged Mars with my new ASI462 for the first time. Results were pretty good, but could be improved. Based upon what I've seen on the various astro-boards, my image was about a 4 on a scale of 1-10.  

I imaged Mars on five nights, Oct 2, 13, 14, 21 and 22. Results were generally bad to awful. But on the 22nd I was able to get a respectable image.

Planetary photography is a tricky business. Lots of things can go wrong, and frequently do. The real culprit is the fact that we have a thick atmosphere above us. The twinkling of the stars on a crisp clear winter night is evidence of that atmosphere. Stars are very big, but they are incredibly far away. So far away that they appear as points of light, even in large telescopes. As the narrow beam of light makes its way to the observer it has to pass through various layers of the Earth's atmosphere. As it does the light is refracted and bent to and fro. What we see over time is that beam coming to us from various angles and that makes the star twinkle. 

Since planets are close enough to us that they appear as a disk (although you'll need a telescope to see that), the twinkling effect doesn't occur. Since the disk is composed of lots of beams of light, each randomly refracting, but all in different directions at the same time, we see the combination of all them. Thus, instead of a twinkle, planets appear steady. But the disk image distorts over time because the beam combination is different as the air moves between us and the planet. These random fluctuations of the light are a big problem - they cause the planet's disk to 'bubble' and 'wobble' in the telescope's field of view. You may be aware of this if you've ever looked in a telescope or pair of high power binoculars at a terrestrial object during the heat of a summer day. The object appears to rapidly move about; sometimes appearing blurry but every now and then sharpen to crystal clarity (Outer Limit's fans will recognize the phrase). 

So, planetary imagers use a technique known as 'lucky imaging'. This technique is used to record hundreds or even thousands of images over a short time span in order to capture some images when the seeing is momentarily steady. In order to capture this many images in a short period of time though we need a camera capable of high speed imaging. The ASI462 is one such camera - a video camera for astrophotography. But, just like with deep sky imaging, the process is rather involved.

On the evening of October 22 seeing conditions were pretty good, about 3 or 4 on a five point scale with 5 being the best. My location is not all that great for planetary imaging since my telescope location is within a 'bowl' of terrain surrounding by trees, and the denser air settles and swirls about around my property. I set up and waited for the scope to reach ambient temperature and for Mars to rise higher in the sky (the higher the better - less air mass to image through). 

At 9:53 PM I set the system to capture Mars over a total exposure period of 6 minutes. The camera was set to take 45 frames per second, at 5ms per frame. I was able to capture 27,415 images on this run.

Here is a sample of 50 frames from the beginning of that run. This video was taken with my ZWO ASI462 through an EdgeHD11 telescope equipped with a Televue Powermate 4x teleconverter. This makes my EdgeHD equivalent to an 11" f/40 (11700mm) telephoto lens!


As you can see the image moves quite a bit. But this is actually a nice run. But even in the short 1-2 second clip you can see areas of the image that appear sharper for a fleeting fraction of a second. With over 27,000 images all we need do is locate the best images from the set. That's where AutoStakkert comes in. 

AutoStakkert is an image stacking software. As the author Emil Kraaikamp puts it: 

"AutoStakkert!  is all about alignment and stacking of image sequences, minimizing the influence of atmospheric distortions (seeing). Its goal is to create high quality images of the Planets, the Sun, and the Moon, without too much hassle".

AutoStakkert takes the video and processes the individual frames finding the 'best' of the bunch as per specific parameters set by the user. I usually ask for the 20% best. If the time is kept short, this is all that needs to be done to get a stacked image of the selected frames. But since I was exposing for a full 6 minutes, the rotation of the planet needs to be taken into account. After all, Mars rotates almost the same as Earth; 24 hours, 39 minutes, and 35 seconds to be exact. In a period of 6 minutes, Mars would rotate about 1.46 degrees, probably enough to cause some blurring of the image (although considering all the other factors I had to deal with, probably unnoticeable). To compensate for the planet's rotation, I use another software tool called WinJUPOS. This tool will take the video from AutoStakkert, along with the stacked image, and de-rotate it so that the movement due to planetary rotation is cancelled. This de-rotated version of the video is then reprocessed once more with AutoStakkert to produce a final stacked image. In my case, 5,483 frames of the original 27,415. The resultant image is shown below:


With the stacked image and de-rotation taking care of much of the seeing perturbations we now have a much cleaner image. But it's still not as sharp as we would like; the air turbulence is still causing some blurriness. The detail is trying to come out.

Next up, and the next to final step in the imaging process is to apply discreet wavelet transformation on the image to remove as much of the noise as we possibly can and sharpen the image, bringing out the details that are there, but covered up by the noise in the image. I do this with a tool called Registax. Once the proper parameters are set (which in itself is a time consuming trial and error process) the final image comes to life - and the results are magical.

Mars 10/22/2020 - EdgeHD11 fl=11,700mm
ASI462 - 6min - 5,483 frames

A final pass with Paint Shop Pro to enhance the color and adjust the brightness and contrast and I'm done. A rather successful night. Still not as good as what I see other amateurs accomplishing, but good enough for me. In the image you can see the polar cap, Mare Sirenum (the dark patch just to the right of center) and Amazonis the bright area on the bottom half. The most recognized region, Syrtis Major, is on the opposite side of the planet when this image was taken. It will be centered in early to mid November, and if the skies are clear I'll attempt to capture one more image for the record books. Mars and Earth will be separating rapidly during the next few weeks and so the image will be smaller. 

Tuesday, September 29, 2020

Cosmic Strings from the Big Bang?

Not much happening in my astrophotography endeavors, other than I'm busy processing the data I captured from the 5 straight nights of clear skies - thank the Lord!


But I came across this article in Quanta Magazine which was a real eye opener. Has to due with the possibility that cosmic strings may be giant filaments left over from the birth of the universe. Strange stuff ... read the article here:  Quanta MagazineGo there even if you're not interested in string theory - the opening graphic is awesome.

Monday, September 7, 2020

Getting ready for Mars' Opposition

In just a few weeks, October 13, 2020,  Mars will be the closest to earth since July 27, 2018. And, it won't be closer until 2035!  Back in 2018 I did try to photograph the red planet, when it was a bit closer than it will get this year, but a number of circumstances made it a not-so-great opposition. It was, by all accounts, supposed to be a great opposition (For information about the 2018 event you can head on over to an article in EarthSky by Bruce McClure). And in many ways it was.  But I ran into a number of problems.

First, Mars was low in the southern sky. Since it's orbit is inclined to the ecliptic, it's position at each opposition depends on where it lies on the orbital plane relative to earth. Second, the weather didn't cooperate. Lots of cloudy nights kept me from getting any good images. And the clear nights the atmosphere was very turbulent. Finally, the third obstacle was also weather related - Mars' weather that is! A super dust storm covered the whole planet for most of the time while it was close to the earth.

This year, things are different. It will still get really close (about 38.9 million miles vs. 35.9 million in 2018). That will make Mars appear as 22" in diameter; in 2018 it was 24" (a " is an arc-second; each arc-second is 1/3600 of a degree) well within the capability of my equipment. Then, the position is very much favorable, as Mars will get high in the sky, at a declination of 5 degrees (vs -25 degrees back in 2018). Whether or not the weather (on both planets) cooperates or not is any one's guess.

Planning for this opposition has been underway, and I've been configuring my new ASI462MC planetary camera over the past few nights in preparation for the event. A new Televue Powermate 4x is still on order, but should be arriving soon. This lens will be able to further magnify the image provided the atmosphere is steady enough to allow its use (always a problem here in Maryland). 

Mars Sept 5, 2020
EdgeHD11; ASI462mc f/25
Stacked 4000 frames of 20,000


My first test image turned out quite well. Taken in the wee hours of September 5th after significant processing I was able to get some pretty good detail to show up. And, no dust storms.

October should provide a great opportunity to get some really nice images. 

Saturday, August 29, 2020

The Magic of Image Processing, Part 2 - Selection of Image Subs

In my previous post on the The Magic of Image Processing - Part 1, I discussed the capturing of the data and the initial calibration and stacking to get a single master frame.  It is a well known fact that stacking lots of subs yields better signal to noise ration (SNR). After all, that's why we take lots and lots of images. We want to reduce the overall noise as much as possible to achieve the best possible image at the end. In that article I showed how this stacking process yields a final master that we then use to produce the final image. What I did not mention is that we go through a process of selecting only the best subs before the stacking is completed.

Stacking all the subs taken on a given evening of imaging is not ideal because some may be degraded in some way. The obvious issues are subs with airplane (or satellite) trails in them, shifting images due to sudden movement of the mount, etc. We generally want to only use the best subs we have. Now I know it's tempting to use all the subs captured, especially since clear nights are hard to come by and who wants to throw away precious images. But how do you know what's good enough? Where do you draw the line?

Excluding the obvious cases of ruined subs, there are two key measures that I look at when deciding which subs to keep and which to reject. They are the eccentricity (E) and the Full Width Half Maximum (FWHM) values of the image. 

Photographing a faint nebula or other deep space object requires long exposures of up to 10 minutes or more. The telescope mount must counter the earth's rotation so that the image stays fixed in the camera's view. But, no matter how good the mount is, there is always opportunity for the image to drift. Wind and mount gearing issues are a couple of the things that can effect absolute perfect tracking. Whenever the tracking fails (either it doesn't keep up with the earth's rotation, or speeds up for some reason) stars appear elongated, or 'eggy' and image details suffer. The measure of this 'eggyness' is the eccentricity. Stars with eccentricities of 0 are perfect disks. Eggy stars have E values in excess of 0.6. It turns out that the human eye will accept an object as 'round' as long as its eccentricity is 0.42 or less. With that in mind, I will usually set my software to accept subframes where the star images have eccentricities of 0.5 or less, allowing a little bit of extra freedom. 

The second measure, FWHM, is a measure of the quality of an astronomical image based on how much the telescope and atmosphere have smeared a point source in an image over several pixels on a camera's sensor. When the atmosphere is very unsteady, the light from a distant object does not fall on the same location on the sensor over time. Since it is refracted, or bent, as it moves through the various layers of air, over the duration of an exposure the light is smeared out and is not as distinct or sharp as it could be. Ideally a star should produce a fairly small disk on the sensor. Bad seeing makes this disk much larger, and the star appears bloated. Of course, all the data is equally smeared, so the overall image appears soft and blurry. Since none of us can afford time on the Hubble Telescope, we must deal with the effects of the atmosphere on our images.

I have found that FWHM values of less than about 6-8 produce good results. The actual value changes with the camera, telescope and focal length, but you generally want the smallest FWHM value as you can get. And, during the night, the FWHM can change, usually because of clouds, water vapor, and other atmospheric phenomena. 

The software I use, PixInsight, provides a function that calculates these measures (and others) as part of a subframe selection process. When I have all the subs for a given object, I run the Subframe Selection tool to measure the values of E and FWHM. Based on the results I decide what subs to keep and which ones to reject. 

Recently I have collected a number of subs of the famous Pillars of Creation, near the center of M16, the Eagle Nebula. I still need to collect more before I can complete the final image, but I do have sufficient Ha subs that I can use to show the effect of E and FWHM on a completed master.


The image on the left is a stacked image of subs that had eccentricities > 0.45.  On the right, the E values were <= 0.45. You can see that the stars are more distinct and rounder.


The image on the left is a stack of subs with FWHM > 8, while the one on the right < 8. The stars are less bloated and the overall image is clearer (although the eccentricity issues are still there).

As you can see both images on the right are improved over the ones on the left. If I stack both sets of subs, low E and FWHM I get the ideal master (it is very noisy since it is composed of only 8 subs) with the clarity that the best subs can produce.


Even this final master exhibits some minor bloating, and it looks like there is still a small issue with eccentricity, but that will be improved when the full set of subs are combined.


Wednesday, August 19, 2020

Radio Telescope damaged - SpaceTime is weird - Asteroid Near Miss

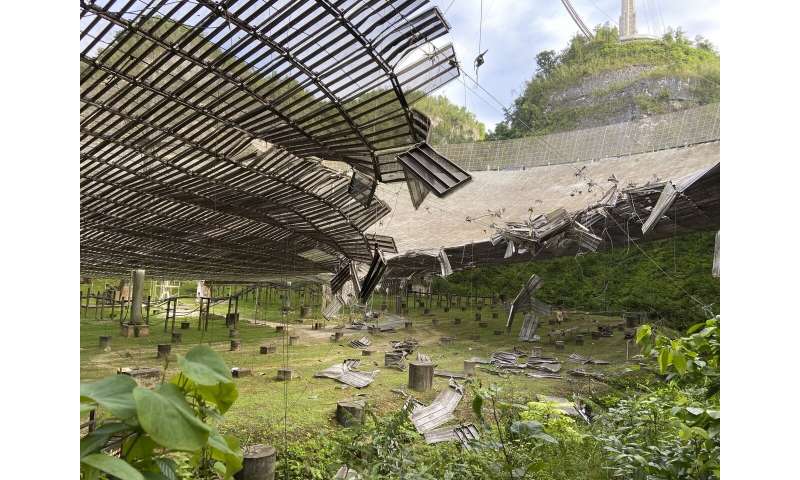
Arecibo Observatory Damaged

A broken cable caused severe damage at Puerto Rico's Arecibo Observatory, causing a suspension of operations for one of the world's largest single-dish radio telescopes.

Broken cable damages giant radio telescope in Puerto Rico 

Complete story at:

Phys.org 


Spacetime is Weird

For those of you who are interested in special and general relativity, spacetime and all that stuff, this is a really good read. Ethan Siegel, senior contributor at Forbes does a really great job of explaining some of the mysteries of our universe - indeed our very existence.

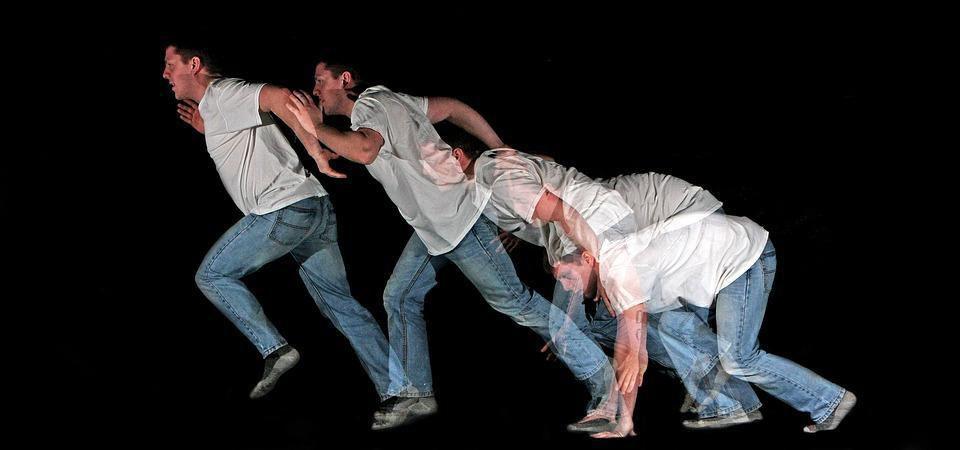
Both space and time coordinates are needed to describe an object in our Universe.

Read the article at Forbes


Record Breaking Close Encounter

A car-sized asteroid just made the closest-known approach to Earth without actually colliding with the planet. And researchers didn't even know about it until hours after it had already passed.

Asteroid 2020 QG, formerly known as ZTFoDxQ, zoomed past Earth on Sunday at 12:08 a.m. EDT, getting as close as 1,830 miles away. It marks the closest asteroid flyby ever recorded in which the object actually survived, according to NASA. (CBS News)


Monday, August 3, 2020

New Crayford focuser installed

One of the issues with the EdgeHD telescopes (actually, most SCTs) is that they are notoriously difficult to focus especially when trying to image with them. The reason is simple - focus is accomplished by moving the main mirror up and down the optical tube. Although the mirror can be locked in place once focus is achieved, as soon as the temperature changes the optical path alters a bit and the focus needs adjustment.  You can't do that remotely - you have to go out to the scope, unlock the mirror, go back inside, refocus, go back outside, lock the mirror and then continue. So I haven't been locking the mirror, just refocusing periodically throughout the night.

Another problem is that as you focus in and out the image shifts. This is because the mirror tilts a bit as it moves. And, during the night as the scope alters it's orientation to the ground, the mirror moves as well. All of this makes it hard to keep getting in-focus images during long sessions.

Well, there is a solution, and it's called the CHL 2.5 inch Large Format Crayford EDGE focuser from Moonlite.  This piece of equipment mounts on the rear of the OTA before the rest of the imaging train (OAG, Filter Wheel and Camera). Now the mirror is locked down tight and focus is achieved by moving the drawtube holding the imaging train in and out, much like a standard refractor telescope. No more mirror flop, no more shifting image, just a smooth focus operation.

I purchased one a few weeks ago, and finally got around to installing it on my scope. There were some issues getting the focus point to reach the critical 146mm. Because the Celestron Off Axis Guider I use is so wide, there wasn't a whole lot of wiggle room getting everthing connected, but it's all set up and I tested it a few days ago. And the results are outstanding. Here is a test image of a star field showing the results.


No only are the stars tack-sharp, edge to edge, but the light cone is now almost perfectly centered on the camera sensor (probably a side effect of not using any spacers so now the imaging train is really solid).  The guide camera still needs to be adjusted to support guiding, but I'll do that later this week. I might add that since I didn't have the guide system working, this test image (15x30sec) was unguided! This simply demonstrates the quality of the AP1100-GTO mount that I got back in April.

Once hurricane Isaias passes by (and the water drains) I'll complete the calibration and be ready to image once again - only now with a much better focuser in play.

Saturday, August 1, 2020

Setting up the EdgeHD-11

Cloudy skies - oh well.  While I'm waiting to get back to imaging I decided to create a short video of what my steps are in setting up for a session with the telescope.


Hope you like it.

If the video is not visible on your mobile device, get it here
 

Thursday, July 30, 2020

Comet NEOWISE fading fast

I setup for imaging NEOWISE from my home site on July 26 and the 27th.  Placed my Canon50D piggyback on the GT102 with my Canon 100mm lens. Little did I know that my focus (on both nights) wasn't set properly and so both sets of subs were very sub-par.  After trying to process them multiple times the results were just not worth the effort.  I realized later that the focus ring on my Canon lens is so loose that it can rotate out of focus really easy.  Should have taped it down or used my Tamron which is much stiffer in that respect.

With the moon reaching full phase this weekend, the skies will be awash with moonlight. Once the moon reaches a point where it doesn't rise until after NEOWISE sets the comet will have dimmed to the point where the tail is significantly reduced in size and brightness.  So it's goodbye to comet NEOWISE.  Now I'll be waiting for the next bright comet to favor our skies.

Sunday, July 26, 2020

NEOWISE from Mikey's Place

Finally, NEOWISE is high enough that I can capture it from my home with the large telescope mount.  The sky wasn't very good though, lots of thin cirrus clouds.  But I decided to image the comet anyway.

Didn't have time to process the stacked images, but here is a single sub from my Canon50D with 100mm lens piggybacked on my GT102 and AP1100 mount.

Once the subs are processed I'll post the results here.

Comet NEOWISE
July 26, 2020 - Canon 50D/ 100mm f/3.5 60 sec ISO800

Friday, July 24, 2020

Comet NEOWISE - Close Up (Update)

Well, I took another shot at getting a better image.  Processed the 22 x 30sec images taken around 9:45PM.  Since there were more subs the noise was reduced a bit and I got some of the color as well.

Comet NEOWISE - July 18, 2020 9:45 PM
GT102 APO f/5.5  -  Canon 50D  -  22x30 sec ISO800

Comet NEOWISE - Close up

On July 18, 2020, the skies were rather clear and I decided to return to my church's property with my portable telescope setup (William Optics GT-102 APO, iOptron iEQ30 mount, Canon 50D).

I wanted to get some longer exposure images of the comet with a close up on the head and so the GT102 seemed like a good bet.  I realized that I would not be getting a lot of the tail(s). 

After spending about a hour and a half, 212 images later, and lots of processing time at home, I did manage a fairly good close up of NEOWISE.  I am a little disappointed that the image showed very little color.  The green coma was visible, but the final image didn't show it.  The sky conditions were not good enough to capture the ion tail in it's full glory, but I was also disappointed in that I really couldn't pull enough detail out of it as well - also devoid of any color.  Not sure if this is due to processing issues, or sky conditions.  Anyway, here it is.

Comet NEOWISE - July 18, 2020 - ~10:08 PM
GT102 APO f/5.5  - Canon 50D - 10x60sec subs - ISO800


Once the comet gets a little higher in the sky I'll image it once again at home with both my 11" EdgeHD and a piggyback Canon with 100mm lens.  That is if the clouds go away!  Each day that goes by the comet is getting dimmer, and, there are some reports (still unverified) that the nucleus may be starting to disintegrate.  Let's hope not.

Thursday, July 16, 2020

Comet NEOWISE at night

On July 15th I arrived at CrossLife Bible Church, Westminster MD, my home church, for our normal prayer group meeting at 6:30 PM.  The service ended at 7:30 and I noticed that the skies were somewhat clearing up toward the north/northwest.  We have a clear view in the direction where NEOWISE would be and so after dropping my wife back home I returned to the church property and setup my camera.

It was 8:40 when I arrived and got setup. There was still a lot of high cirrus clouds covering the sky where NEOWISE is located. I looked for the comet from about 8:50 to about 9:41 and nothing, not with the naked eye, not with 10x50 binoculars. Then, at 9:45, I spotted it! Shinning through the thin clouds it was still a splendid sight.

Comet NEOWISE, July 15, 2020 10:06 PM
18mm, f/5.6, ISO 1600 15x5 sec


It was about 74 degrees, with a strong wind (it's always windy at the church since we sit at the top of a hill and for some reason all the air rushes right over our site). I knew I would lose some shots just due to the camera being buffeted by wind gusts over 20mph. But my patience paid off.

I took 118 images, and processed four different sets. One of those sets produced a fairly good image of NEOWISE even considering the image was shot through a layer of clouds.

Comet NEOWISE, July 15, 2020 10:08PM
270mm, f/6.3, ISO1600 10x5sec


This image of NEOWISE was taken at 10:08 PM with a Canon 70D and Tamron 18-270mm lens. The lens was set at the full 270mm focal length and aperture at f/6.3. I took 21 subs, of which I used 10 in the final stack. Each was taken with an ISO of 1600, exposure time of 5 seconds. The subs were pre-processed and stacked with Nebulosity 4.0, and the stacked image further processed in PixInsight and Paint Shop Pro. I did take darks to limit the sensor noise and hot pixels, but Nebulosity didn't do such a good job removing the pixels. You can see them in a zoomed-in version of the photo as streaks of colored dots.

Now that the weather is not looking so good for the next week or so, it looks like the next photo opportunity will be at my home with the WO-GT102 telescope on my AP1100GTO mount. The comet will likely fade a bit by then (it is moving quickly away from the sun) but it will be much higher in a darker sky, and finally high enough to clear my tree line.


Thursday, July 9, 2020

First Images of Comet NEOWISE

Early this morning I was able to capture some initial images of C/2020 F3 NEOWISE.  I had provided some charts in my previous post and with NEOWISE only getting about 10 degrees up in the NE there was no chance I could image it from my home. So I packed up my Canon 70D and headed to my church property in Westminster. I decided against bringing my portable telescope figuring I try with just the Canon on a tripod and see what I could get.

The first photo is a composite (stacked) image of 10, 2sec exposures, at a high ISO value of 3200. The Tamron 18x270 lens was set to 77mm (I had wanted 100x but somehow the zoom slipped) at f/5.6.

C/2020 F3 NEOWISE, July 9 2020, 4:54 AM
Canon 70D, 77mm, f/5.6, ISO 3200, 10x2 sec


The second is a composite of 10, 1 sec exposures at ISO 1600, 270mm, f/6.3.  Since these exposures were taken rather late, the sky had brightened considerably. Lens fogging didn't help either!

C/2020 F3 NEOWISE, July 9, 2020, 5:06 AM
Canon 70D, 270mm, f/6.3, ISO 1600, 10x1 sec


Neither set of images were processed to eliminate/minimize noise, so they are a bit noisy.

Plan is to take a few more later this week, potentially Saturday morning, weather permitting.  Then, when NEOWISE makes it to the evening skies, I'll image with the either the GT102 or the EdgeHD11.


Sunday, July 5, 2020

Comet C/2020 F3 (NEOWISE)

Well, surprise, surprise ... one of the newly discovered comets might actually be visible and is not breaking up.  With the demise of ATLAS and SWAN I was hesitant to report on any hope of sighting a comet with the naked eye anytime this year.

But, NEOWISE is still going strong and is now positioned for the northern hemisphere.

If you want to see NEOWISE you have two choices.  Early in the morning, before sunrise or (later in the month) just after sunset.  It is probably the brightest right now and will be dimming slowly over the next two weeks so catching it in the AM might be worth the early rise from bed.  For those who prefer their sleep, it will be visible in the NW after sundown, and will be rising higher and higher in the sky (important if you are viewing from a location with lots of trees - like at my observatory.)

The two charts below will give you a rough idea of where to look for the comet.  Each one is fixed at a particular time (roughly with the sun about 10 degrees below the horizon) and shows the position of the comet on each day from July 6th through the 25th.

Comet NEOWISE - Morning
Reisterstown, Maryland


NEOWISE doesn't rise very high in the early morning sky as it moves around the sun in it's orbit. It is the highest on July 10th, about 15 degrees above the horizon at 5:00 AM.  Distance between each horizontal grid line is 20 degrees.

The evening views are a little better, and the comet gets higher each succeeding night, but also dims as well.

Comet NEOWISE - Evening
Reisterstown, Maryland

Recent reports put comet NEOWISE at magnitude 1 - 2, which is certainly bright enough to be visible with the naked eye, but I would bring along a pair of binoculars if you have them.

Depending on the weather, I may be transporting my portable telescope to try to capture some images.  Later in the month, when the comet is high enough to clear my treeline, I'll capture it with my larger rig.

Graphics courtesy of Starry Night®
(Starry Night Pro) (Version 8) / Simulation
Curriculum Corp.

Saturday, June 20, 2020

A Globular, a Star Cluster and Three Galaxies

The new mount is performing admirably. Still a few items to take care of and calibrate, but the full functionality is working just fine.

First up is M68. Messier 68 is a globular cluster in the equatorial constellation Hydra. It was discovered by Charles Messier in 1780. William Herschel described it as "a beautiful cluster of stars, extremely rich, and so compressed that most of the stars are blended together". His son John noted that it was "all clearly resolved into stars of 12th magnitude, very loose and ragged at the borders". (Wikipedia)

M68 Globular Cluster in Hydra
EdgeHD-11 / ASI1600mm camera
40x10sec Lum

This monochrome image was taken on May 31, 2020, with my EdgeHD-11 and ASI1600mm camera. A combination of 40 luminance subs using very short exposures (10 sec).

Next is M88, a spiral galaxy in the constellation Coma Berenices. Recent analysis puts it at about 61.94 million light-years distant. It was discovered by Charles Messier in 1781. M88 lies in the thick of what is called the "Realm of Galaxies", and is among the brightest of the spiral galaxies in the Virgo cluster. The full extent of the disk, about 125,000 light-years across is dominated by dust all the way to the core of the galaxy.

M88 Spiral Galaxy
EdgeHD-11 / ASI1600mm camera
100x60sec Lum; 50x60sec RGB

This photo of M88 was imaged between June 8 and June 10, 2020. At 2.5 hours total integration time, it is composed of 100x60sec L subs and 50 each of 60sec RGB subs.

Next up are two elliptical galaxies, M49 and M89. Elliptical galaxies are a type of galaxy with an approximately ellipsoidal shape and a smooth, nearly featureless image. They are one of the three main classes of galaxy described by Edwin Hubble in his Hubble sequence and 1936 work The Realm of the Nebulae, along with spiral and lenticular galaxies. (Wikipedia)

M49  is located about 56 million light-years away in the equatorial constellation of Virgo. This galaxy was discovered by French astronomer Charles Messier on February 16, 1777 and was the first member of the Virgo Cluster of galaxies to be discovered.

M49 Elliptical Galaxy
EdgeHD-11 / ASI1600mm camera
100x10sec Lum

M89 is another elliptical galaxy discovered by Charles Messier on March 18, 1781. It is also located in the constellation of Virgo, about 50 MLY from earth. It is nearly perfectly spherical.

M89 Elliptical Galaxy
EdgeHD-11 / ASI1600mm camera
100x10sec Lum

Finally, an open star cluster, M18. This cluster of stars, in the constellation Sagittarius, was discovered by Charles Messier in 1764. It is relatively close lying at about 423,000 light-years distant. It is a sparse cluster about 26 light-years across. This image was taken on June 13, 2020.

M18 Open Star Cluster
EdgeHD-11 / ASI1600mm camera
20x10sec RGB


Monday, June 15, 2020

Busy "Day" with the EdgeHD

Yes, the emphasis is on the word 'day'.

One of the unique capabilities of the Astro-Physics mount is that it can allow you to start your imaging session in the east with the counterweights UP.  Now that probably doesn't mean a whole lot to those of you who are not astro-nuts like me (and there are others of course who do get it). But one of the scary times of a long evening's imaging session is when the scope passes the meridian.

The meridian is an imaginary line that extends across the sky from due south to due north. It is the point where a German equatorial mount has to stop tracking, flip completely around to the other side of the pier, re-acquire the object it was tracking and then continue. Now I have had a relatively good success with my meridian flips. But even when they work you lose some precious imaging time while the scope re-acquires the object, and because the camera is now also flipped the post-processing gets a little trickier. When they don't work, the telescope stops tracking and you are done for the evening (if you are in bed).

But the Astro-Physics mounts allow you to start in the east with counterweights up, thus not requiring any flip. But there is a problem with this scenario - with the telescope essentially upside down the camera can find itself dangerously close to hitting the pier (or equipment that might be mounted on the pier). It has the issue when you are trying to image at high declination values (for you non-astro-nuts), that means directly overhead or to the north. So, we need to make sure that doesn't happen.

Astro-Physics APCC Users Guide

And that is what I did today. During the cool of the evening, while it was still light outside, I mapped out the whole allowable movement space of the mount for each declination 5 degrees at a time. With that data the mount has a mapping of the sky where the telescope is free to move without fear of striking the pier. A safe-zone so to speak. Took a bit of time, but well worth the effort.

Now, if only the skies would clear so I can try out this new capability.

Friday, May 29, 2020

Supernova in M61

Earlier this month I spent some time installing my Off Axis Guider (OAG) on the Edge11.  With new spacers I was able to get the OAG to work pretty good.  I was still having issues with the FOV and sensitivity of my guide camera though and so finding a star and guiding was still problematic.  I since purchased a new guide camera based on reviews and comments of the folks on the forums I frequent - the ZWO ASI174mm. This camera has solved my OAG problems of getting decent stars to guide on.  Alas, the clouds rolled in and I have not been able to image anything with the new OAG setup.

But, back on May 13 when setting the spacers I was able to capture M61, a spiral galaxy in the constellation of Virgo. I was using this field of view as my test view for getting the focus on the OAG worked out.  Although I did process the image later that night, the focus was still a bit off due to terrible atmosphere conditions, but I still wanted to get the RGB stack processed to show the supernova (SN 2020 jfo) that appeared in the galaxy.

Here is the image showing the galaxy (cropped up close) with the supernova marked. The power output of an exploding star is immense. This star (or what's left of it) is almost brighter than the entire core of the galaxy!  The other three bright stars are foreground stars in our galaxy between earth and M61.

M61 with SN 2020 jfo
Edge11 and ASI1600mm RGB 20x60sec each

Wednesday, May 20, 2020

The Magic of Image Processing

The Magic of Image Processing - Part I

Over the years I have been asked by friends to explain how I get my beautiful astro-photos, especially from a light polluted sky near Baltimore.  Well, the actual process is pretty complicated and sometimes intense, both in the time and effort put into it as well as the techniques used.  But I'll try to outline the basic steps.

Please note that it is not my intention to provide a detailed account on how this is all done by providing the complete steps, but just to give an overview and high-level look at the workflow.  Part I of this post will cover the capturing of the data and the initial calibration and stacking to get a single master frame.

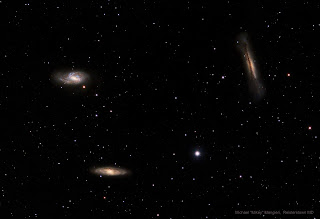
For this example I am using a section of the Leo Triplet image that I posted on Astrobin back in March of this year (see image above). In particular, M65, an intermediate spiral galaxy about 35 million light-years away in the constellation Leo. In the image it is the galaxy in the lower left.

First step, of course, is to actually photograph the object.  Although this is not part of the post-processing effort, without it there would be nothing to process!  The original photo is a combination of RGB and L subs (subs are the individual photos - many are stacked in the post-processing to create the final image). For the purpose of this discussion I will be using only the luminance subs (monochrome; no color) to make matters a bit simpler. I will be using 64 of the original 70 L subs, each one taken with an exposure of 120 seconds.  Images were taken through my 4", GT102 APO refractor with a ZWO ASI1600mm cooled monochrome camera.

Once we have a good set of raw photos (no star trailing, out of focus, airplane trails across the image - yes, happens a lot) they go through three steps: calibration, registration and integration.

Calibration

Images (subs) of our object are known as lights. Since these raw subs contain additional data that we do not want they must be calibrated to remove, or largely minimize, the bad signal from the good signal. What are the bad signals? Thermal noise from the camera itself, uneven light across the field of view and electronic read noise are the three basic ones.

The thermal noise is due to the fact that heat from the camera itself builds up and triggers the sensor just as light does. With exposures sometimes exceeding 5-10 minutes per sub this buildup can be rather large. And since the amount of signal is proportional to the temperature of the sensor, the higher the temperature, the more heat signal the sensor collects. This is mitigated to a large extent by cooling the sensor and most astrophotography cameras are equipped with thermoelectric coolers. My camera is typically cooled to -20 degrees Celsius (-4 degrees F) even in the summer.

Uneven light is the vignetting of the image due to the optics of the telescope/camera combination. The intensity of the light fades off as it approaches the edge of the sensor. In addition, dust particles on the sensor glass (and filters) produce faint halos and spots (dust bunnies) on the image.

Then there is the noise produced by the very process of reading the data from the sensor.

Calibration is the process of removing as much of this unwanted data as possible.

To remove the thermal noise, special subs, called darks, are taken which are used to remove the thermal noise from the original lights. These dark frames are subs with the same exposure times as the lights but with the sensor closed off to any light. The signal contained in these dark frames is therefore only from the thermal noise. If we subtract the darks from the lights we get a resultant sub that has the thermal noise removed. This process relies on the randomness of thermal energy and is too complicated to fully discuss here, but you get the idea.

The unevenness of the light frame is corrected by the use of a flat. Flats are subs taken through the telescope in the same configuration as when it was taking the original lights. A uniform light source (the daytime sky through a tee-shirt, or an electroluminescent panel) is used to make sure the sensor receives just the view of the optical train with no subject matter - nice uniform, even light. These flat frames, which contain only the dust shadows and the fall-off along the edges, are then used to correct for the vignetting and shadows by dividing the data on the light by the flat data. Again, a bit complicated.

Finally, bias frames are taken to subtract the read noise from the image. These are taken with no light and exposures of as close to 0 seconds as possible as we only want the information produced from the camera's electronics in reading the data off the sensor. These bias frames are then subtracted from the lights as well. In the case of my particular camera, I don't use bias frames, but use dark flat frames instead. Again, too much to discuss for now.

The following diagram may help to visualize what is taking place.

Deep Sky Stacker

I typically create about 40 dark frames to create a single master dark; about 20 dark flats, and 20-25 flats. Multiple frames are taken to reduce the random noise within these calibration frames and produce a more even image.

With my darks, dark flats and flats ready to go I can now calibrate the 64 lights of M65 using a program called PixInsight, my software of choice. This same program will also be used post-calibration to complete the images.

Registration

Registration is the process of aligning each of the calibrated lights to a reference frame so that they all line-up together. Although the telescope is tracking the object closely during the exposure, it is not perfect. And it is actually desirable not to have every frame line up perfectly. I intentionally move each image a small amount when taking the exposures in order to further randomize the noise and other unwanted signal data. This process is known as 'dithering'. 

Integration

With all the light frames now fully calibrated and registered its time to combine them all into one master frame. This is the process of 'stacking'. You might have been wondering why we don't just take a single long exposure shot of the object. There are lots of reasons. Remember in the discussion above how the sensor temperature plays into all this? A single 60 minute exposure would produce a lot of thermal signal (probably too much to eliminate). And then there is the guiding. Even a high-end quality mount might not be able to track precisely enough over an extended amount of time (although with accurate polar alignment in a permanent observatory it probably could). Finally there are the other annoyances - i.e., 18 minutes into a 20 minute sub an airplane passes right through the field of view, producing those 'lovely' bright light trails over the image! For these reasons, and one more 'big' reason (to be discussed really soon), we typically take lots of smaller exposure subs and then combine them to get the final image. In other words, take 60, one minute subs instead of one, sixty minute sub.

So, what's that other big reason?

Thankfully, because of the nature of the universe, the way God created it, noise is random. Every time you take an image the information on the camera sensor that was due to thermal and other forms of noise is a little bit different than in the previous image. Over time it averages out to a certain quantifiable level, but every pixel on a frame, and every frame, will have differing levels of brightness - the actual signal from the object (what we want) and some random amount of signal from the noise (what we don't want). Since the object's signal is constant, and not random, the contribution of total energy from the object builds up as you might expect - one unit of signal multiplied by ten frames equals 10 units of signal. But since the noise is random, multiple frames produce a final total noise energy that does not add up uniformly. The contribution due to noise will be slightly less. How much less? Proportional to the square root of the number of frames less. This means that if I double the number of subs, the real signal increases by 2 but the noise increases by 1.414 (the square root of 2). One way to measure this is by calculating the SNR, or signal to noise ratio.

Astrophotographers pay particular attention to the SNR. This is simply the amount of signal divided by the amount of noise. The higher the SNR, the better. So, for example, lets say a sensor pixel picks up 100 photons of light every second. In one second the SNR would be:
But if we expose for 100 seconds (or the average of ten 10-second exposures) we would get a SNR of:
The higher the SNR, the better the final image will be. Therefore, more subs are better than a few subs. In fact, it is not uncommon for astrophotographers to take 60-200 subs (of each filter) to get the final photo.

OK, enough words and theory, lets see what this all really means.

Here is a single light frame of M65 (120 seconds at f/5.6):


Hmmm, not much showing up!  Where's the galaxy?

Well, it's there, just hard to see. Why?  Because most of the signal is buried deep in the low end of the image spectrum. This object is rather dim, and so there isn't much signal to capture in 120 seconds.

We are going to detour a bit from our processing discussion to discuss how digital cameras work as this is necessary to understand some of the processing techniques.

For simplicity let's imagine that the pixels on a camera sensor are little buckets. Each bucket can only hold so many electrons. As a photon of light strikes the sensor, an electron is created and is stored in the bucket. My camera, for example, has a sensor that can have data values from 0 to 4095. This is called the dynamic range of the sensor. My buckets can hold up to 4096 electrons.

Now, the higher the data value in a bucket, the brighter the pixel in the resulting photo. Buckets that are empty will produce a totally black pixels in the resultant photo. Buckets that are partially filled will produce varying shades of grey.  And, if a bucket fills up completely, you get pure white.

If I was to take a photo of the moon, or some other bright object, the pixels on my camera will fill up pretty fast. And, there would be some that have no data (dark areas) and some that have lots of data (light areas) and some that are in-between.  In a completely white, overexposed frame, every bucket would be full (4095 electrons). But in the case of dim objects like galaxies, nebulae, dust clouds, etc., even after exposing the sensor for minutes at a time most of the buckets only fill up a little bit.

So, in the single sub above, the vast majority of buckets have near zero data values (dark space) and only a few have maybe 10-500 electrons in them. So the range of the data in the image is only 0-500 out of the possible 4095. My buckets are only about 1/8th full at best. That's why the end result is pretty unimpressive. The few pixels that have information in them only produce very dark shades of grey, with a few producing some brighter whites.

But what if we multiply each pixel/bucket value by some factor so that each bucket appears nearly full.  In the case of the image above, since the largest bucket amount is only 500, if we multiplied each by 8 we would end up with buckets that are filled, or nearly filled, and therefore would create a photo where most of the pixels (that at least contained some electrons) would now have much larger values and therefore appear brighter.  We essentially do just that, by a process known as stretching. It isn't as simple as multiplying every pixel with a single value, as the stretch is usually non-linear, but for simplicity the analogy works.

Here is the result of stretching the single light sub.


And there's the galaxy!

But, there's all the noise too.  Since we amplified all the sensor data, the noise was amplified as well.

Now, back to the main discussion.  Here's where the stacking comes in. Remember how we discussed the fact that noise grows slower than true signal?  We use that concept to get an image that contains a lot of data, but over many light subs instead of a single long sub. Thus, we can 'eek out' good data and limit the bad - the SNR gets larger.

The following set of images show progressively larger stack sizes starting with 4-stack and ending with 64-stack; each one twice as large as the previous. You can see how the actual galaxy gets brighter, more detail starts to show and the noise goes down. Note that these have been stretched so you can see the images, but the actual stretching process occurs later in the post-processing steps.


We now have a good master image made up of 64, 2 minute images. The resultant master is basically equivalent to a single sub of 128 minutes, but without the huge amount of noise that a single image like that would have.

In Part-II I will show how we take the master light out of the calibration and integration step and using PixInsight's post-processing routines reduce the remaining noise, enhance the image's detail and adjust the overall quality of the final image. I'll also discuss how color is added to the final image.

Monday, May 18, 2020

Cool Video

I can't recall how many times I've had to explain why chemical rocket technology is not going to get us beyond the local solar system.  Although not the point of this simulation/video it does illustrate the point that the vast percentage of rocket mass is the fuel.

Check it out; it's really pretty well done.

If Rockets were Transparent


Monday, May 11, 2020

More Image Processing

After a good deal of research (and lots of trial and error), I think I have finally got the knack of the new post-processing image process nailed down - at least for now. So, for your viewing pleasure, here are three more DSOs (Deep Space Objects) that I imaged a few months ago and just reprocessed.

First up is the Christmas Tree Cluster and Cone Nebula. Imaged back in February of 2020, this is the result of 15 hours of integration time (60 subs, each 300 seconds, of each filter). Processed in the Hubble Palette (Ha, Oiii, and Sii).

NGC 2264 - Christmas Tree Cluster and Cone Nebula
WO GT102 APO f/5.6 with ASI1600mm Camera
60x300sec each filter
Next is a small reflection nebula near the open cluster NGC 6823 in Vulpecula. The reflection nebula and cluster are embedded in a large faint emission nebula called Sh 2-86. The whole area of nebulosity is often referred to as NGC 6820 (Wikipedia).

NGC 6823
WO GT102 APO f/5.6 and ASI1600mm Camera
20x300sec each filter

Finally, the famous 'Cygnus Wall'.  This is actually a small section of the larger North America nebula (NGC 7000). This image is a combination of the standard SHO palette but with RGB stars added. In the previous two images, the stars appear basically the same color (mostly white) and with a slight purple tint as the narrowband data does not reproduce the star colors correctly. To eliminate this problem I take an additional set of subs in the standard Red, Green and Blue filters with much shorter exposure times to just capture the stars. I then remove the stars from the SHO image leaving just the nebula and add in the stars captured in the RGB data.


The result is a narrowband nebula with correct colored stars. It turns out that I actually overexposed the stars and so they are a bit bloated and not as colorful as they could have been. Later this year I'll retake the stars, add more data to the NB image and recreate the final.

The Cygnus Wall
WO GT102 f/5.6 / ASI1600mm
26x300sec NB;  20x60sec RGB

Saturday, May 2, 2020

A New Comet and A Try at the Rosette

It's official, comet ATLAS has fragmented, and in multiple pieces - dozens of pieces in fact. Once touted as potentially being the comet of the decade it now appears that it will fade out as the days go by.

The Hubble Telescope took these pictures on April 20th and 23rd. As you can see, the once glowing ball of icy rock is now a mess of broken pieces. (See the article in Astronomy).

NASA, ESA, D. Jewitt (UCLA), and Q. Ye (University of Maryland)

I would have liked to get a close up image of the comet with my EdgeHD, but the skies just wouldn't cooperate.

But, although Comet Atlas is no more, Comet Swan looks like it will take over the limelight and is ready to become the “best naked eye comet of 2020.” 

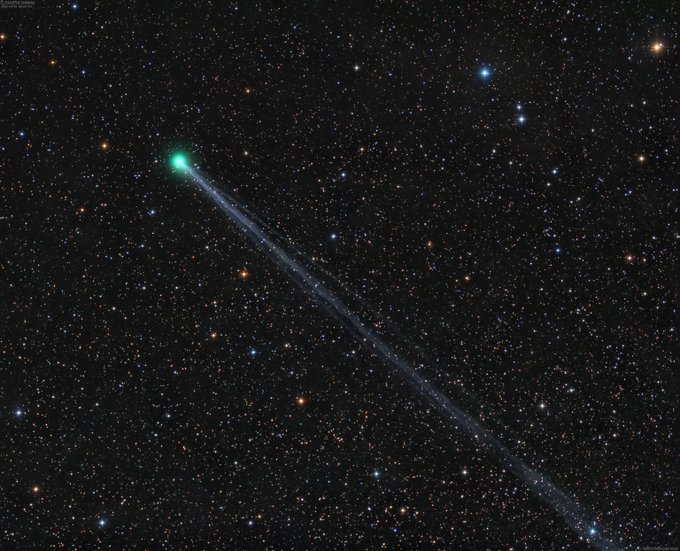
Officially designated as C/2020 F8 (SWAN), it has already brightened sufficiently to be seen by the naked eye - and it's sporting a long thin tail. Damian Peach, noted planetary photographer from the U.K., has taken this photo on April 28th. He stated on Comet SWAN's Twitter account (#Comet) "the tail on this is now at least 8 deg long! The best comet I've seen in some years! 200mm F2 lens with FLI CCD camera."

Image

Bad news for us up here in the northern hemisphere -- Comet SWAN is a southern hemisphere comet. But in late May we should be able to spot it low in the NW just after sunset if the estimates of it's brightness pan out. I'll be posting more info later this month.

With the clouds putting the kibosh on any imaging from Mikey's place the past week, I had some time to process data I captured on the Rosette nebula in narrow-band that I took back in early March with my GT102. The processing gave me fits and it took three attempts (redoing the entire process over from the start) to get it right. Well, as right as I can make it at the present. I'm trying to determine what in the process is not working as well as it could to reduce the noise in the final image. Once I do that I'll probably go for a forth attempt :)

The Rosette Nebula in Narrow-band
March 8 and 9, 2020
GT102 and ASI1600mm Camera -- Just under 6 hrs integration time
'Till next time ...

Mikey


Day 10 - Eidfjord

Our stay in Eidfjord was enjoyable - seeing some very interesting landscapes - and viewed a wonderful panoramic film in the Hardangervidda N...